
Maggie Tsui
Co-founder, CEO of Autoppt. An office software enthusiast committed to improving workplace productivity. I love sharing tips and tools that make daily tasks easier and faster.
Introduction
A large PowerPoint file is rarely just a minor annoyance. It slows down sharing, clutters storage, makes version control messier, and can turn a simple upload into an avoidable problem. You feel it when a deck will not send over email, when a learning platform rejects the file, when cloud syncing drags, or when the presentation stutters on a less powerful laptop five minutes before a meeting.
That is why learning how to minimize PowerPoint file size matters. Not because every presentation needs to be squeezed down as far as possible, but because a lighter file is usually easier to work with. It is easier to upload, easier to store, easier to hand off, and often easier to present smoothly. The key word, though, is usually. The best way to reduce PowerPoint file size depends on what the presentation is for, how it will be shared, how important image quality is, and whether videos or other media need to stay embedded.
A pitch deck shown on a boardroom screen has different requirements from a training deck sent through email. A marketing presentation full of photography needs different treatment from a classroom slide deck with diagrams and screenshots. So rather than treating every optimization method as mandatory, it makes more sense to understand what is making the file heavy and then use the fixes that fit your situation.
In this guide, I will walk through why PowerPoint files get large, how to reduce PowerPoint file size step by step, where quality tradeoffs are worth it, and how to keep future presentations leaner from the beginning.

Why PowerPoint Files Get Large
When people see a PowerPoint file too large to send or upload, they often assume the problem is the number of slides. Sometimes it is, but slide count alone is rarely the real culprit. More often, the weight comes from what is inside those slides.

High-resolution images
This is the most common cause. Photos taken on modern phones and cameras are far larger than most slides need. A full-resolution image may look identical to a downsized version on a presentation screen, but it can add several megabytes to the file.
Embedded video and audio
Media files can make a presentation balloon very quickly. One inserted video may outweigh dozens of regular slides.
Cropped images that still carry hidden data
Cropping an image inside PowerPoint changes what is visible, but it does not always remove the hidden portions of the original file unless you tell PowerPoint to discard them.
Unused masters, layouts, and leftover content
If you copy slides from multiple presentations, old design elements and slide masters can come along for the ride. They are not always obvious, but they still add bulk.
Embedded fonts and decorative elements
Font embedding can be helpful for portability, but it also increases file size. The same goes for elaborate graphics, layered design effects, and certain embedded objects.
Understanding these causes matters because not every large deck needs the same fix. If the problem is photographs, font settings will not help much. If the problem is video, compressing screenshots will barely move the needle.
Why Smaller PowerPoint Files Are More Useful
Minimizing PowerPoint file size is not just about making a file smaller for its own sake. A well-optimized presentation is easier to live with.
A smaller deck is easier to email or upload to a portal with size limits. It syncs more smoothly through cloud storage. It opens faster on older machines. It is less awkward to share with teammates. It is easier to duplicate, archive, and move between systems. In team settings, it can even improve collaboration, because fewer people are fighting slow uploads and bloated versions.
That does not mean every deck should be aggressively compressed. Sometimes visual quality matters more than shaving off a few extra megabytes. But in everyday business and education workflows, a presentation that is lighter and still looks good is usually the more usable presentation.
How to Minimize PowerPoint File Size Step by Step
The best method depends on the deck, but these are the most useful places to start.

Step 1: Save a working copy before making changes
Before you compress anything, duplicate the file. This is especially important if the presentation may be reused later for print, event screens, or brand-sensitive work.
That way, you can create one optimized sharing version and keep the fully editable master intact. This is often the best workflow for business teams, agencies, and educators who need both flexibility and portability.
Step 2: Compress images inside PowerPoint
If you want the fastest route to reduce PowerPoint file size, start with images. In many decks, this is where the biggest gains come from.
Use PowerPoint’s image compression tools to lower image resolution to something appropriate for screen viewing rather than print. Also choose the option to delete cropped areas where appropriate. This is one of the simplest ways to compress PowerPoint file content without rewriting the entire deck.
Be sensible here. If your presentation relies on detailed product photos, architectural drawings, or high-quality marketing imagery, compress lightly. If it is a routine internal deck filled with screenshots and headshots, you can usually be more aggressive without anyone noticing.
Step 3: Resize images before inserting them
This is one of the most overlooked habits. Shrinking an image on the slide does not mean the file behind it has become smaller. If you insert a huge photo and then drag the corners inward, PowerPoint may still be carrying the larger asset.
When possible, resize images before you place them into the deck. Use dimensions that match realistic presentation needs rather than original camera output. This is one of the best long-term ways to shrink PPT file size without sacrificing visible quality.
Step 4: Remove cropped image data
If you have heavily cropped screenshots, stock photos, or product images, check whether the hidden portions are still embedded in the file. In many cases, they are.
Deleting cropped areas can make a noticeable difference, especially in presentations built quickly from large source images. Just be aware that this removes your ability to uncrop later, which is another reason to work on a copy.
Step 5: Compress or link media where appropriate
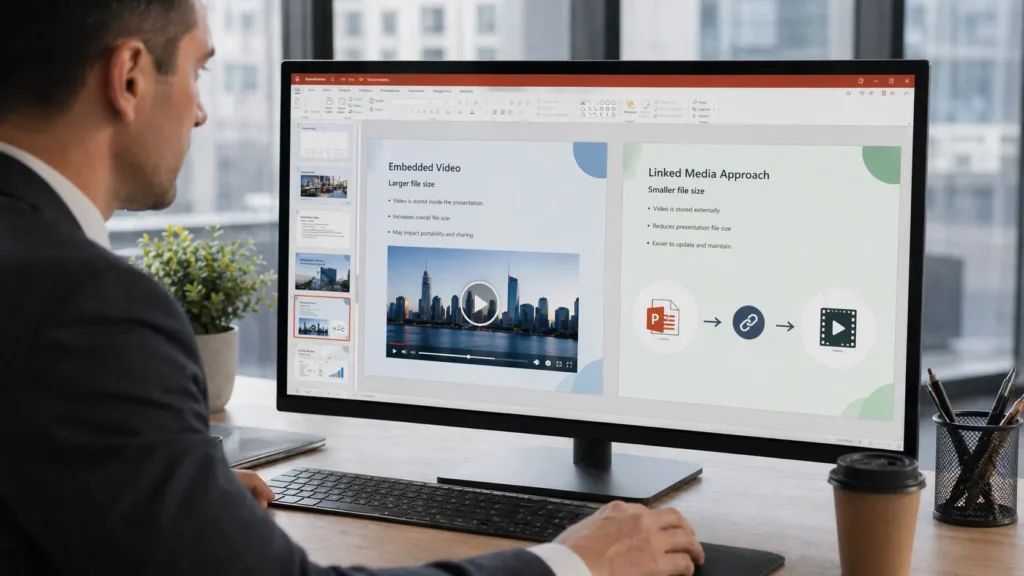
Media is where context matters most. Not every presentation should handle it the same way.
If the deck needs to work offline in a conference room with no internet access, keeping video embedded may be the safest option. In that case, compressing the media may be better than linking out to it.
If the presentation will be shared online, uploaded to a portal, or sent to many people, linking to video instead of embedding it can reduce PPT size dramatically. It also keeps the deck more manageable for collaboration.
So which is better? It depends on whether portability or file size matters more. That is the theme of this entire process.
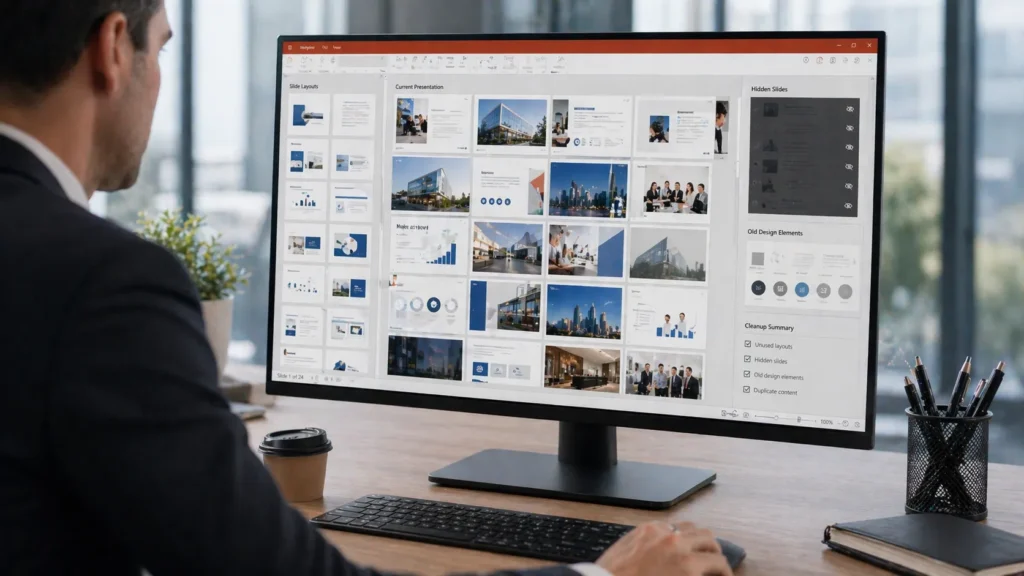
Step 6: Clean up unused slide masters, layouts, and hidden content
PowerPoint files often grow because they inherit baggage from old decks. You copy slides from one source, paste in content from another, bring over a template from somewhere else, and suddenly the file contains more structure than you intended.
Review unused slide masters and layouts. Remove hidden slides you no longer need. Delete outdated elements that were only kept “just in case.” This kind of cleanup is not as flashy as image compression, but it helps optimize PowerPoint presentation files in a more complete way.
Step 7: Simplify design elements that add weight without adding value
Some presentations become heavy because of unnecessary visual complexity rather than one obvious oversized asset. Repeated high-resolution backgrounds, stacked decorative graphics, oversized icons, or elaborate design treatments can all contribute.
This does not mean a presentation should look plain. It means the design should be doing real work. If a background image adds little but costs several megabytes, it may be worth replacing. Good PowerPoint compression tips are not only technical; they are editorial as well.
Step 8: Save in the right file format
In most cases, saving the deck as a standard PowerPoint presentation file is fine. But it is worth checking whether the file format matches the purpose.
If the presentation is meant only for viewing and final sharing, an exported PDF may be more practical, depending on whether animations and media matter. If editing is still required, keep it in PowerPoint format. Again, the right choice depends on how the file will be used.
File Size vs Quality: Be Realistic About the Tradeoff
There is no magic setting that makes a presentation tiny while keeping every asset untouched. Reducing file size usually involves some tradeoff, but that tradeoff does not have to be painful.
For many everyday decks, moderate image compression causes little or no visible harm on screen. In those cases, smaller really is better. But if the presentation depends on detailed visuals, brand photography, or embedded media that must play flawlessly offline, aggressive compression can cause more trouble than it solves.
A useful question is this: what does the deck need to do? If it needs to be emailed quickly, uploaded easily, and opened without lag, optimization matters a great deal. If it is a flagship presentation for a high-stakes event, preserving quality may deserve more weight.
The goal is not to make every file as small as possible. The goal is to make it as small as it needs to be.
Common Mistakes When Trying to Reduce PowerPoint File Size
A few mistakes come up again and again.
Overcompressing visuals
Yes, you can reduce PowerPoint file size by compressing images too far. The result is often soft, blurry slides that look fine in thumbnail view and terrible on a projector.
Assuming slide count is the main issue
A deck with twenty media-heavy slides can be larger than one with a hundred text slides. Focus on assets, not just slide number.
Inserting massive media files without checking size
Large videos and high-resolution graphics often enter the deck because no one checks them first.
Forgetting about hidden data
Cropped image areas, unused masters, and leftover content can stay in the file even when they are no longer visible.
Treating every deck the same way
A sales presentation, a lecture deck, and a marketing showcase do not need identical compression choices.
How Different Users Should Think About File Size
Different teams tend to face different file-size pressures.
Business professionals
If the deck will be emailed, shared in Microsoft Teams, or passed between colleagues frequently, smaller files improve day-to-day usability. Moderate image compression and master cleanup are often the most useful fixes.
Educators and trainers
Teaching decks may include screenshots, diagrams, and sometimes recorded narration. If the presentation is uploaded to a learning platform, reducing file size becomes essential. Linked media may make sense if the platform supports it.
Marketing teams
Marketing decks often rely on strong visuals, so the answer is not simply “compress everything.” Instead, be selective. Use optimized images, preserve quality where it matters, and create a separate lighter distribution version when needed.
Students
Students usually need a practical balance: easy uploading, simple sharing, and decent visual quality. Cleaning images and avoiding oversized media files is often enough.
How to Keep Future PowerPoint Files Smaller From the Start
The easiest way to minimize PowerPoint file size is not to clean up a bloated deck later. It is to build smarter from the beginning.
Resize images before inserting them. Be selective about video. Avoid dragging old clutter from previous presentations into new ones. Use templates that are actually efficient, not just visually polished. Check file size before the deck becomes final rather than after it becomes a problem.
For teams, it helps to create simple internal standards: recommended image dimensions, sensible media rules, and a habit of keeping one master file plus one optimized sharing version.
That kind of discipline saves more time than heroic last-minute compression.
Conclusion
Knowing how to minimize PowerPoint file size is really about making presentations easier to use. A smaller deck is easier to share, easier to store, easier to collaborate on, and often easier to present smoothly. It can reduce friction across the entire workflow, from draft to delivery.
The best way to reduce PowerPoint file size, though, is not always the most aggressive one. It depends on the presentation’s purpose, the quality level it needs, how it will be shared, and whether media must stay embedded. In some cases, image compression will do most of the work. In others, linked media, cleaner masters, or better design discipline will matter more.
If you approach it that way, you will not just shrink the file. You will improve the presentation’s usability without giving up more quality than necessary.
FAQ
What is the fastest way to reduce PowerPoint file size?
Compressing images is usually the quickest and most effective first step, especially if the deck contains large photos or screenshots.
Why is my PowerPoint file too large even with few slides?
Because file size usually comes from the content inside the slides, not the slide count itself. Large images, embedded videos, hidden masters, and font settings can all add weight.
Does compressing images ruin presentation quality?
Not necessarily. Moderate compression often has little visible impact on screen, but aggressive compression can make detailed visuals look poor.
Should I link video instead of embedding it?
Sometimes. Linking can help reduce PowerPoint file size a lot, but embedded media may be the better choice if the presentation must work offline or travel as a single file.
What is the best way to keep future PowerPoint files smaller?
Start with optimized images, manage media carefully, reuse clean templates, and keep a separate share-ready version instead of relying on one oversized master file.
Create worry-free presentations with AutoPPT . Turn your ideas into slides quickly—while keeping them 100% yours!
About AutoPPT: An easy use AI tool for students and professionals. Generate editable slides, customize designs, and focus on what matters—your unique ideas.

Autoppt: Generate presentations in 1 minute!
Start Free Trail Now